Translating Pre-Clinical Research to Clinical Patient Care™

Learning CenterAccess additional learning opportunities. |
Create Content
Editing
Ok, so you've got your content. Now time to clean it up.
The goal here is to provide a no-cost option for content editing.
That being said, if you have the resources and are expecting to produce content on a regular basis, an investment in a Mac and Final Cut Pro might be worth considering, but it is definitely not required. Additionally, it should be noted that video processing is CPU intensive and you should expect performance issues if you are using a CPU-compromised computer.
This page will provide an overview of editing and exporting using Hitfilm Express 4.
Step 1: Download & Install Hitfilm Express 4
This is slightly tricky, as they try to fool you into posting information on your social media accounts, and then opening an account. For many, this is not cool. It is easy to get around. Just click on any one of the social media buttons. A separate pop-up window will open -- just close it. You will need to register -- and then you can scroll to the bottom, and then click Download. You should now be on your way to software installation.
Step 2: Start a Project
Click the project tab, or click New on the left.

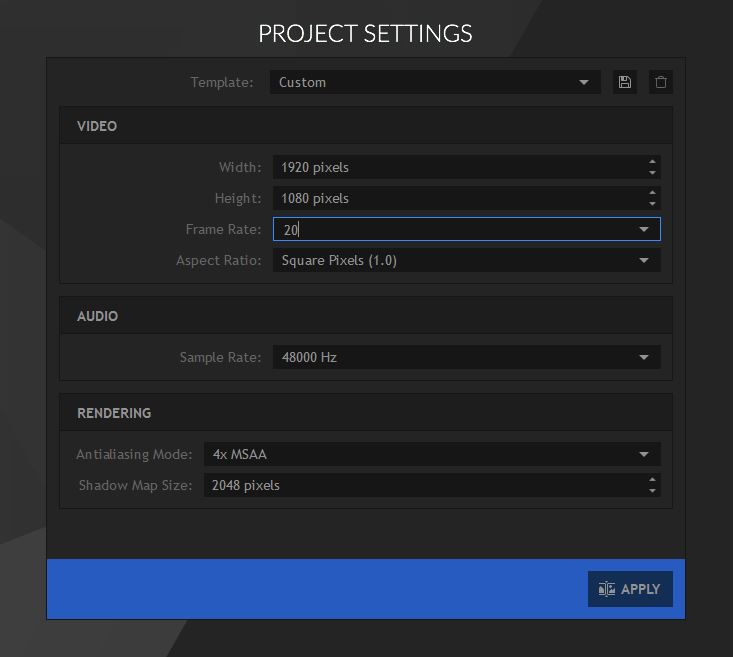
Step 3: Define Project Settings
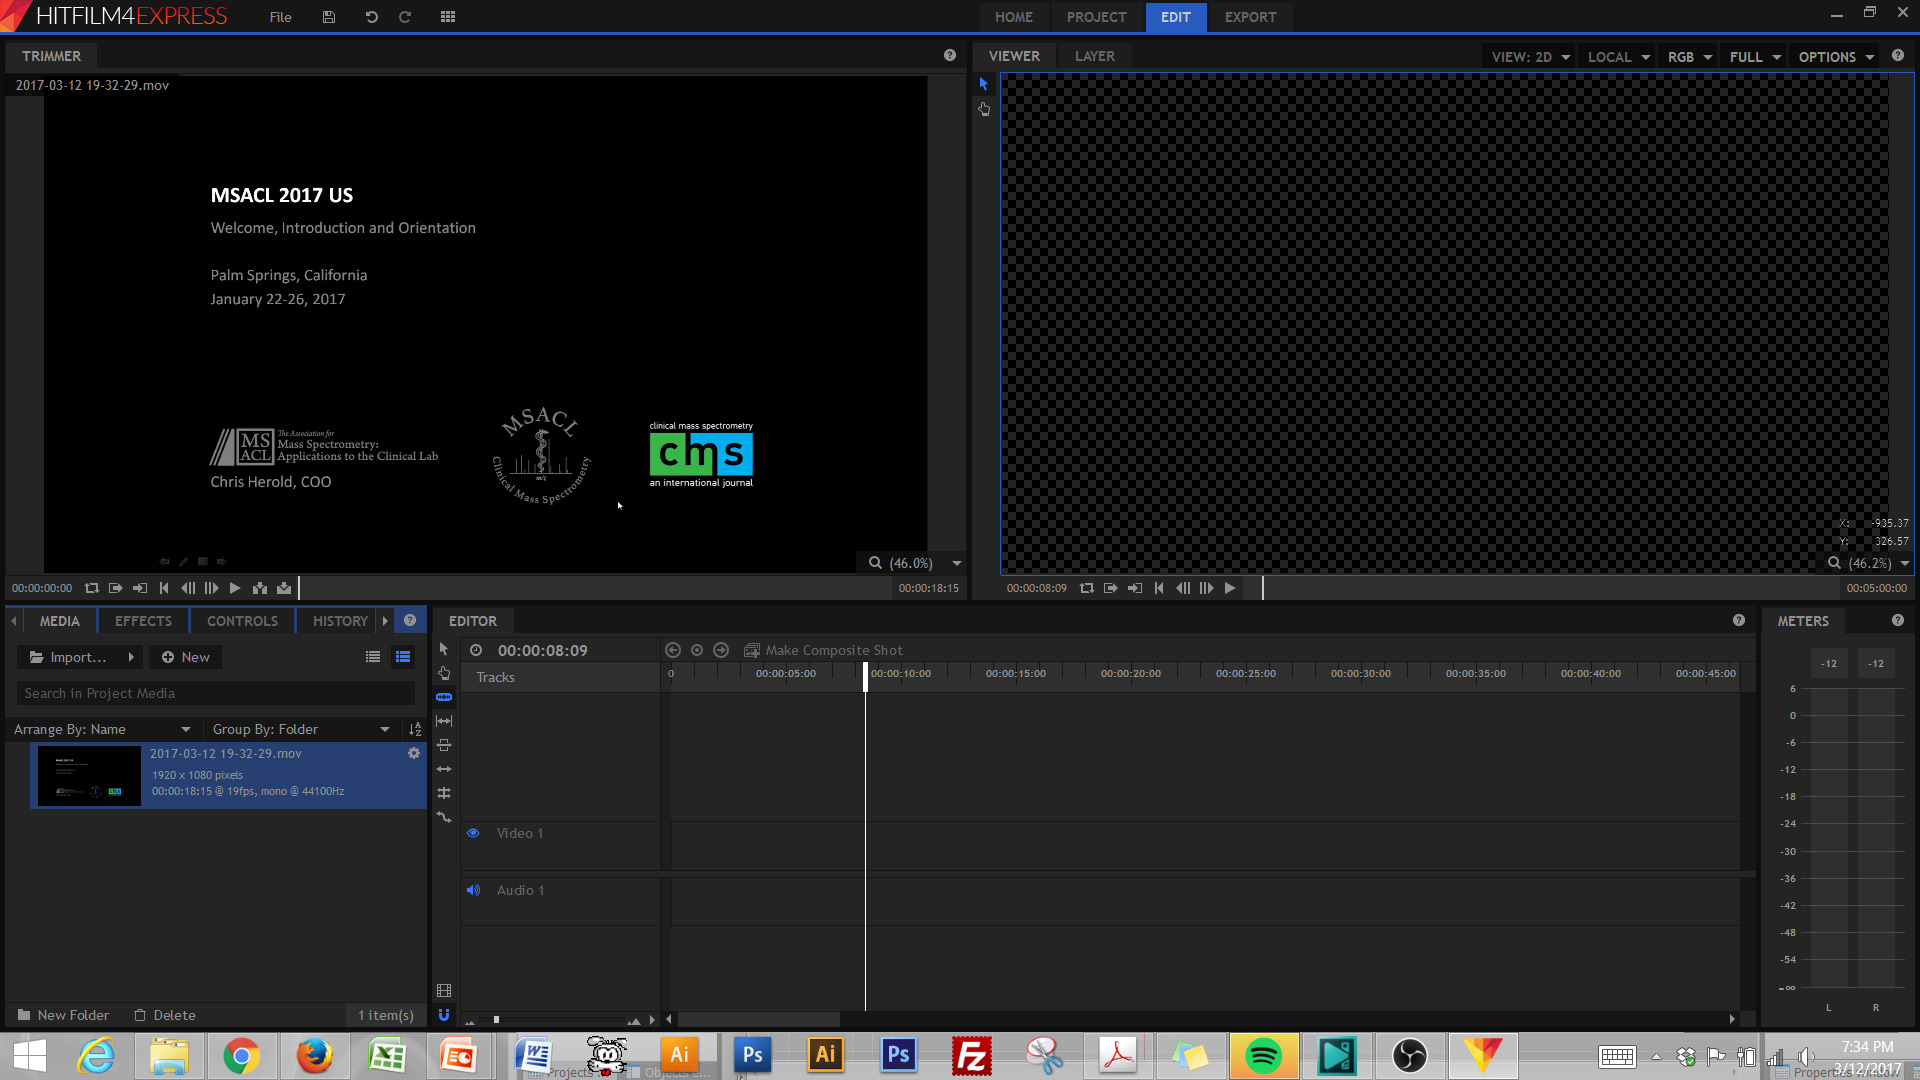
Step 4: Import Your Video Clip (Media)
In the lower left control box, under the MEDIA tab click Import to bring your video recording into the editing program.

Once imported, your video will show in the upper left control box. This is the TRIMMER box. When you make edits, it does not alter this representation.
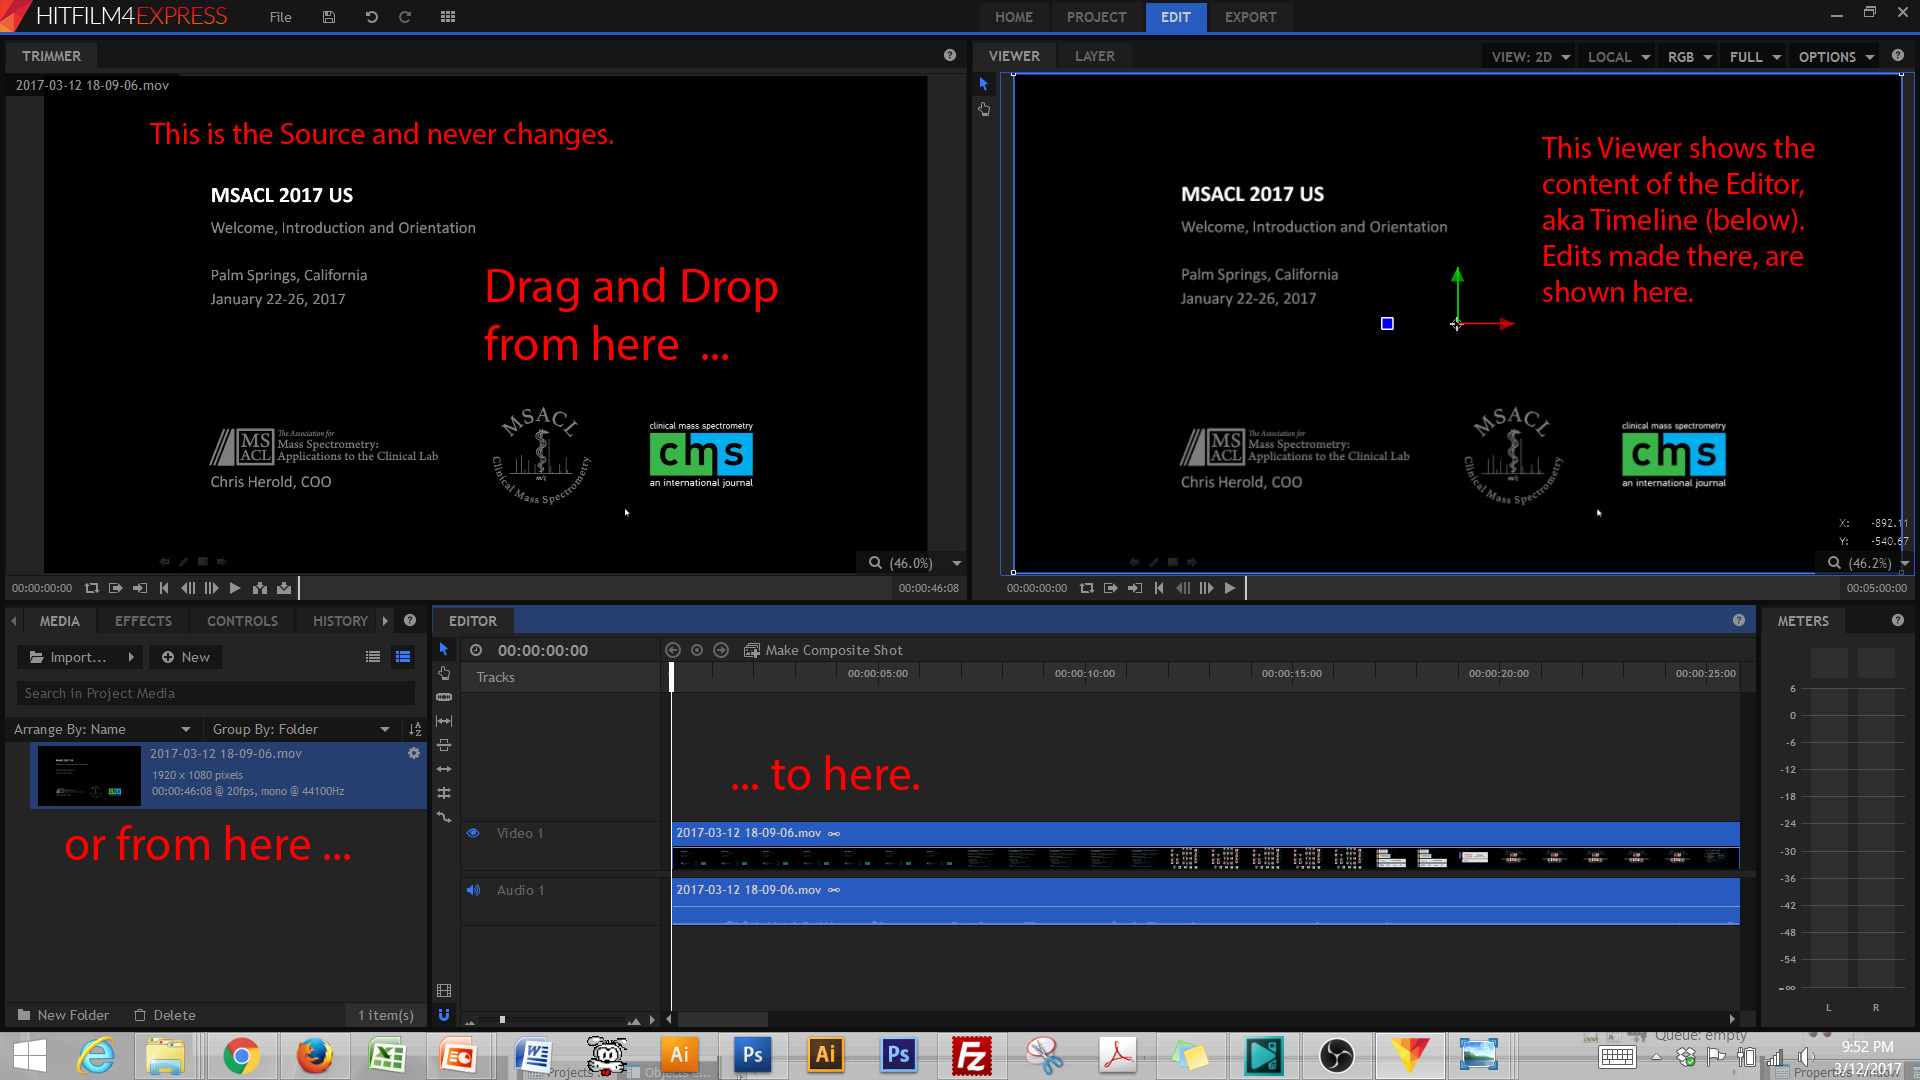
Step 5: Move the Media to the Timeline
To edit your video, click on its representation, either under MEDIA or in the TRIMMER, and drag it to the timeline EDITOR at the bottom of the screen.
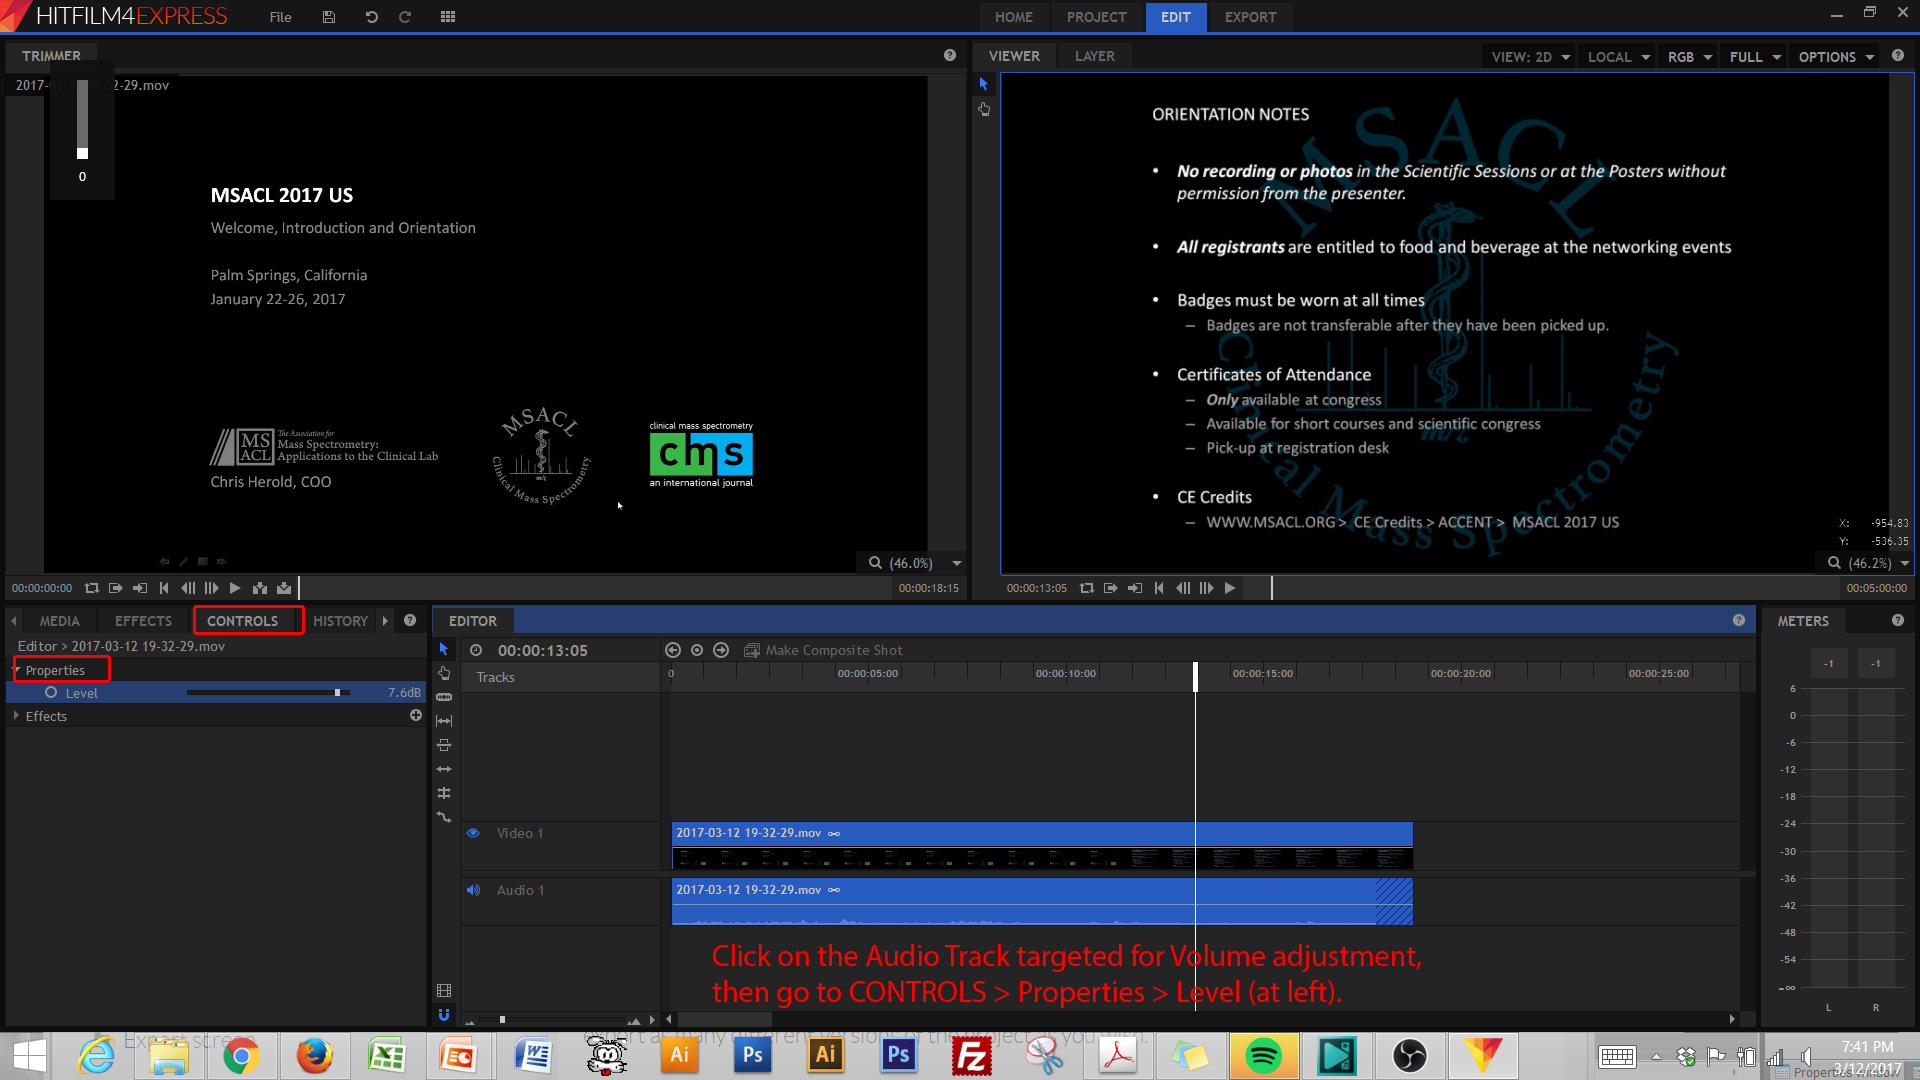
Step 6: Adjust Volume
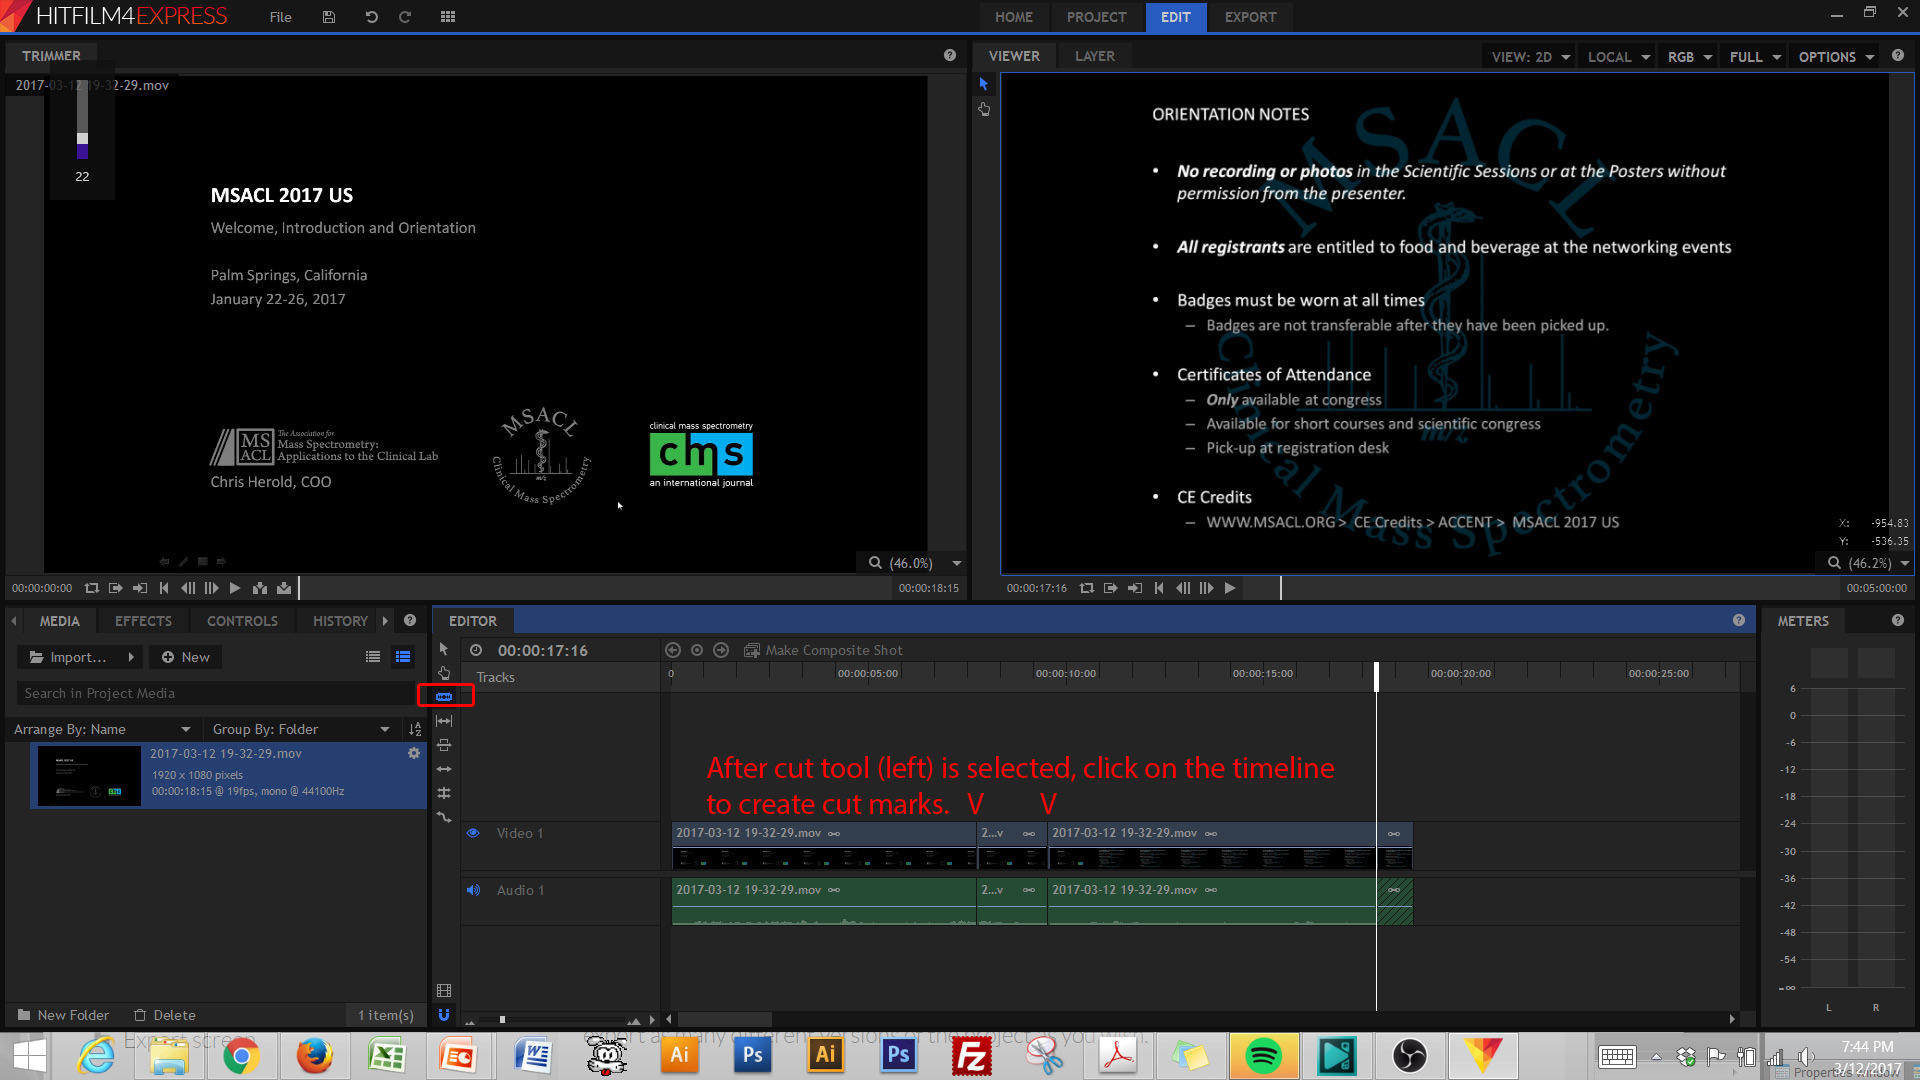
Step 7: Make Trim and Cut Edits
To trim and cut the footage, select the razor tool. This can be used to make cuts in the video and audio stream. This allows selection of discrete components of the footage to apply effects or to Delete.
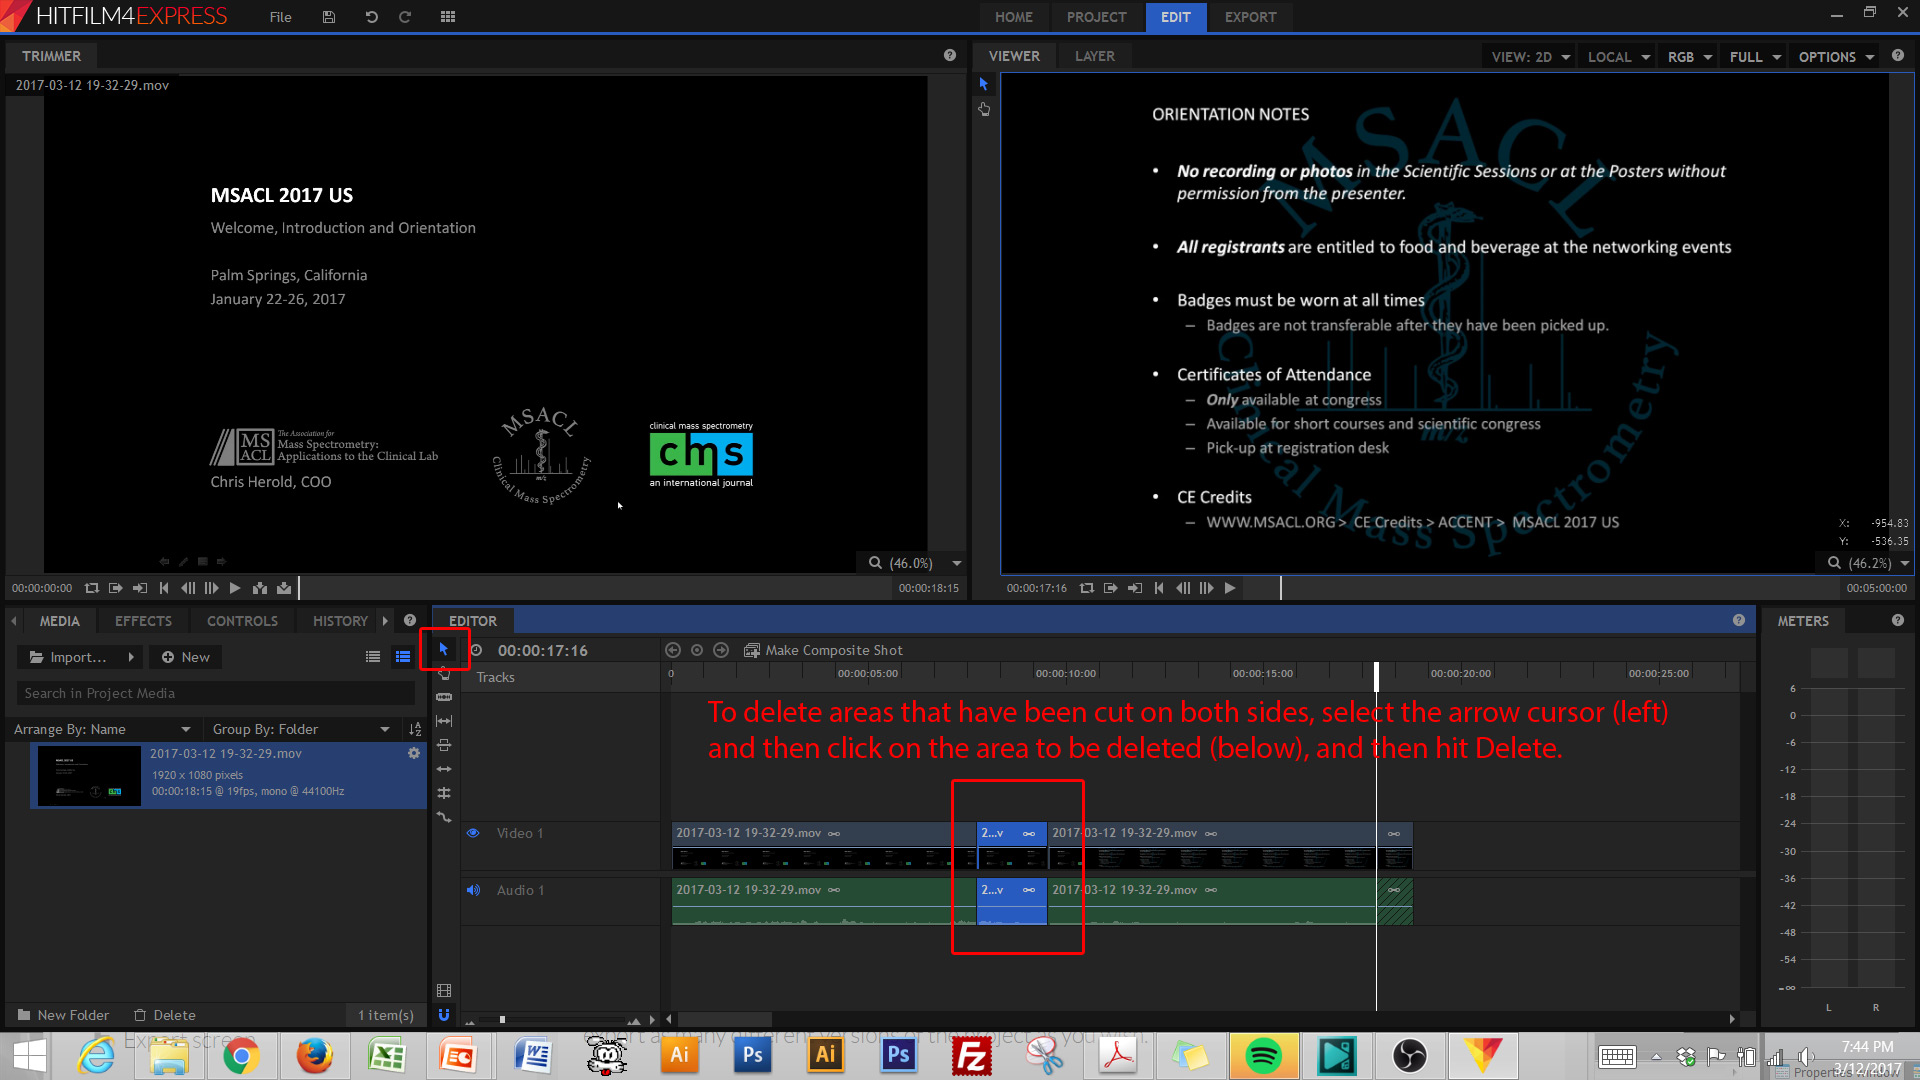
Before you select the segment, be sure to switch from the razor to the pointer tool. Once you have selected the video segment to be deleted, hit Delete on your keyboard.
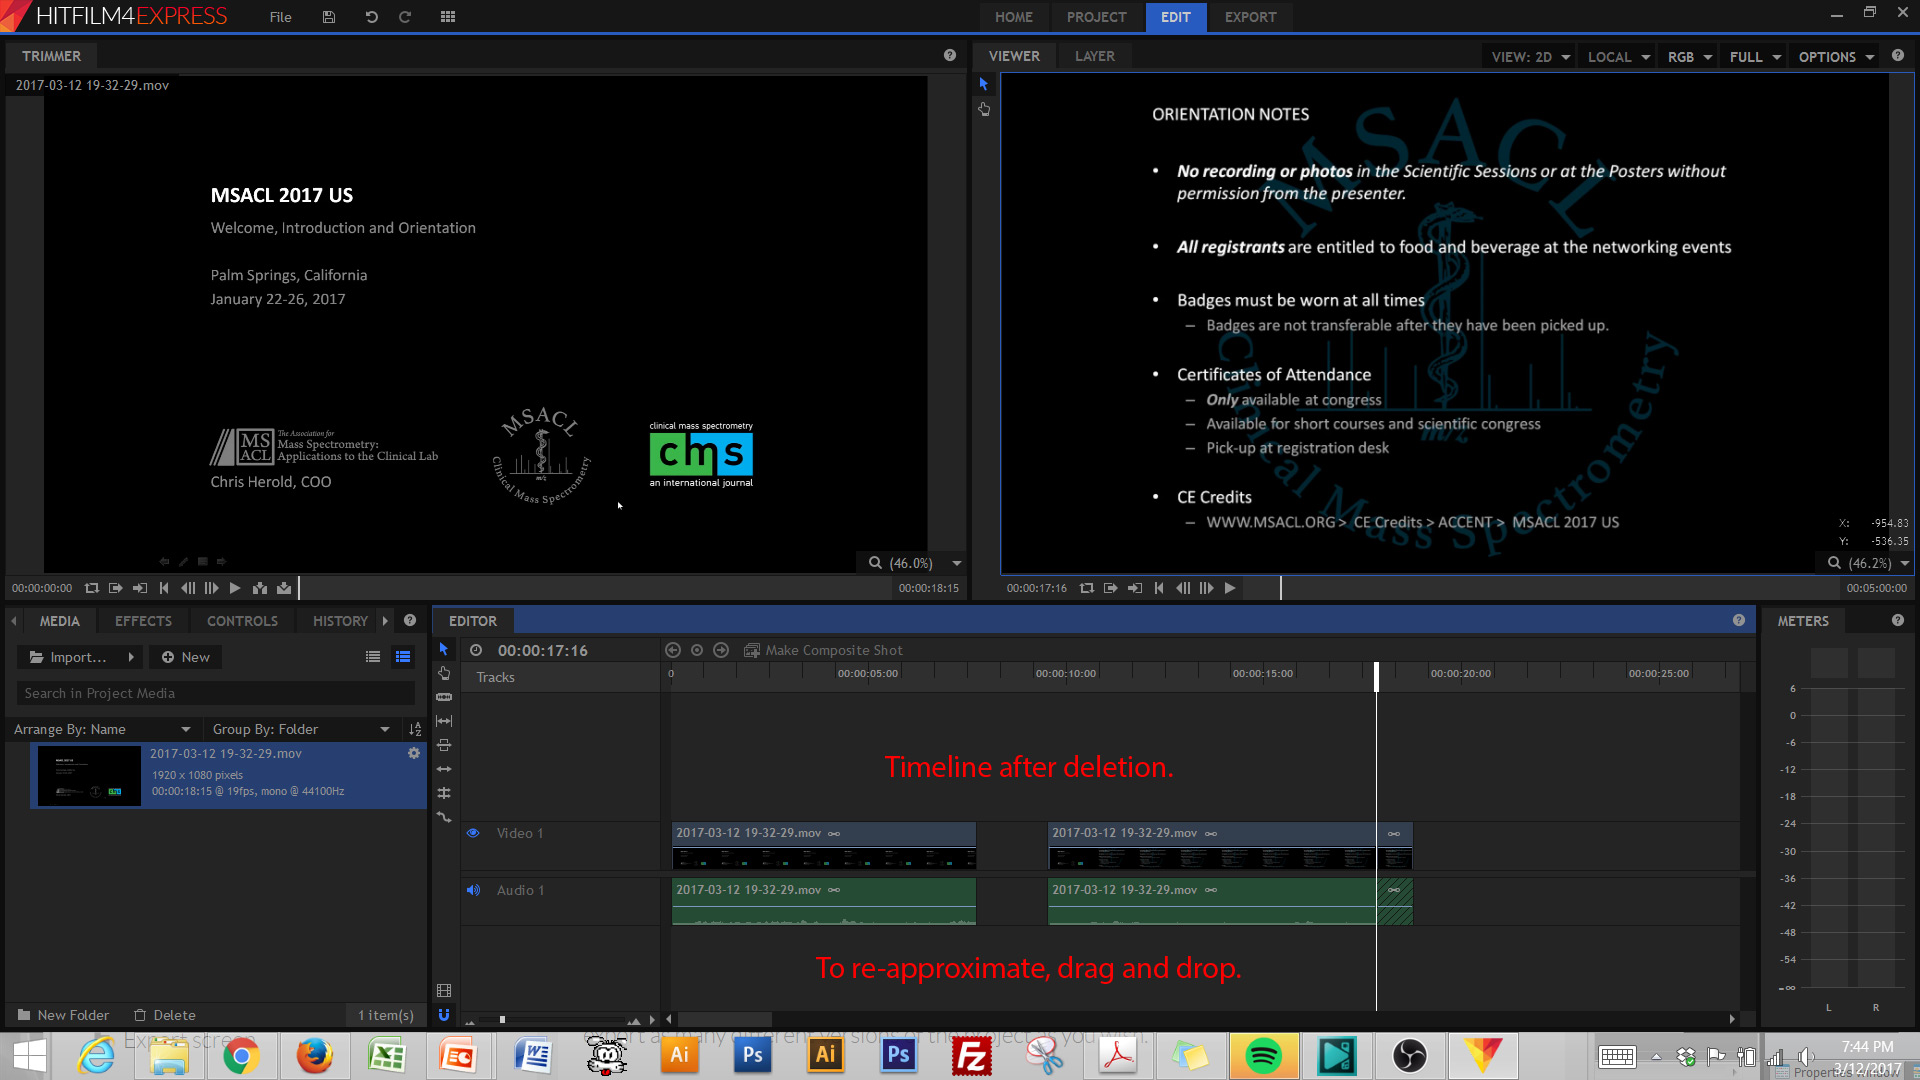
Once the segment is deleted, a gap is left. Drag-and-drop the video remaining on the right, towards the left, to re-approximate the segments.
Step 8: Add Transitions & Effects
For a power point slide presentation, effects and transitions are generally not needed. However, just in case ...
Select the EFFECTS tab in the lower left control box. This will provide folders with various effects that can be placed on the video.
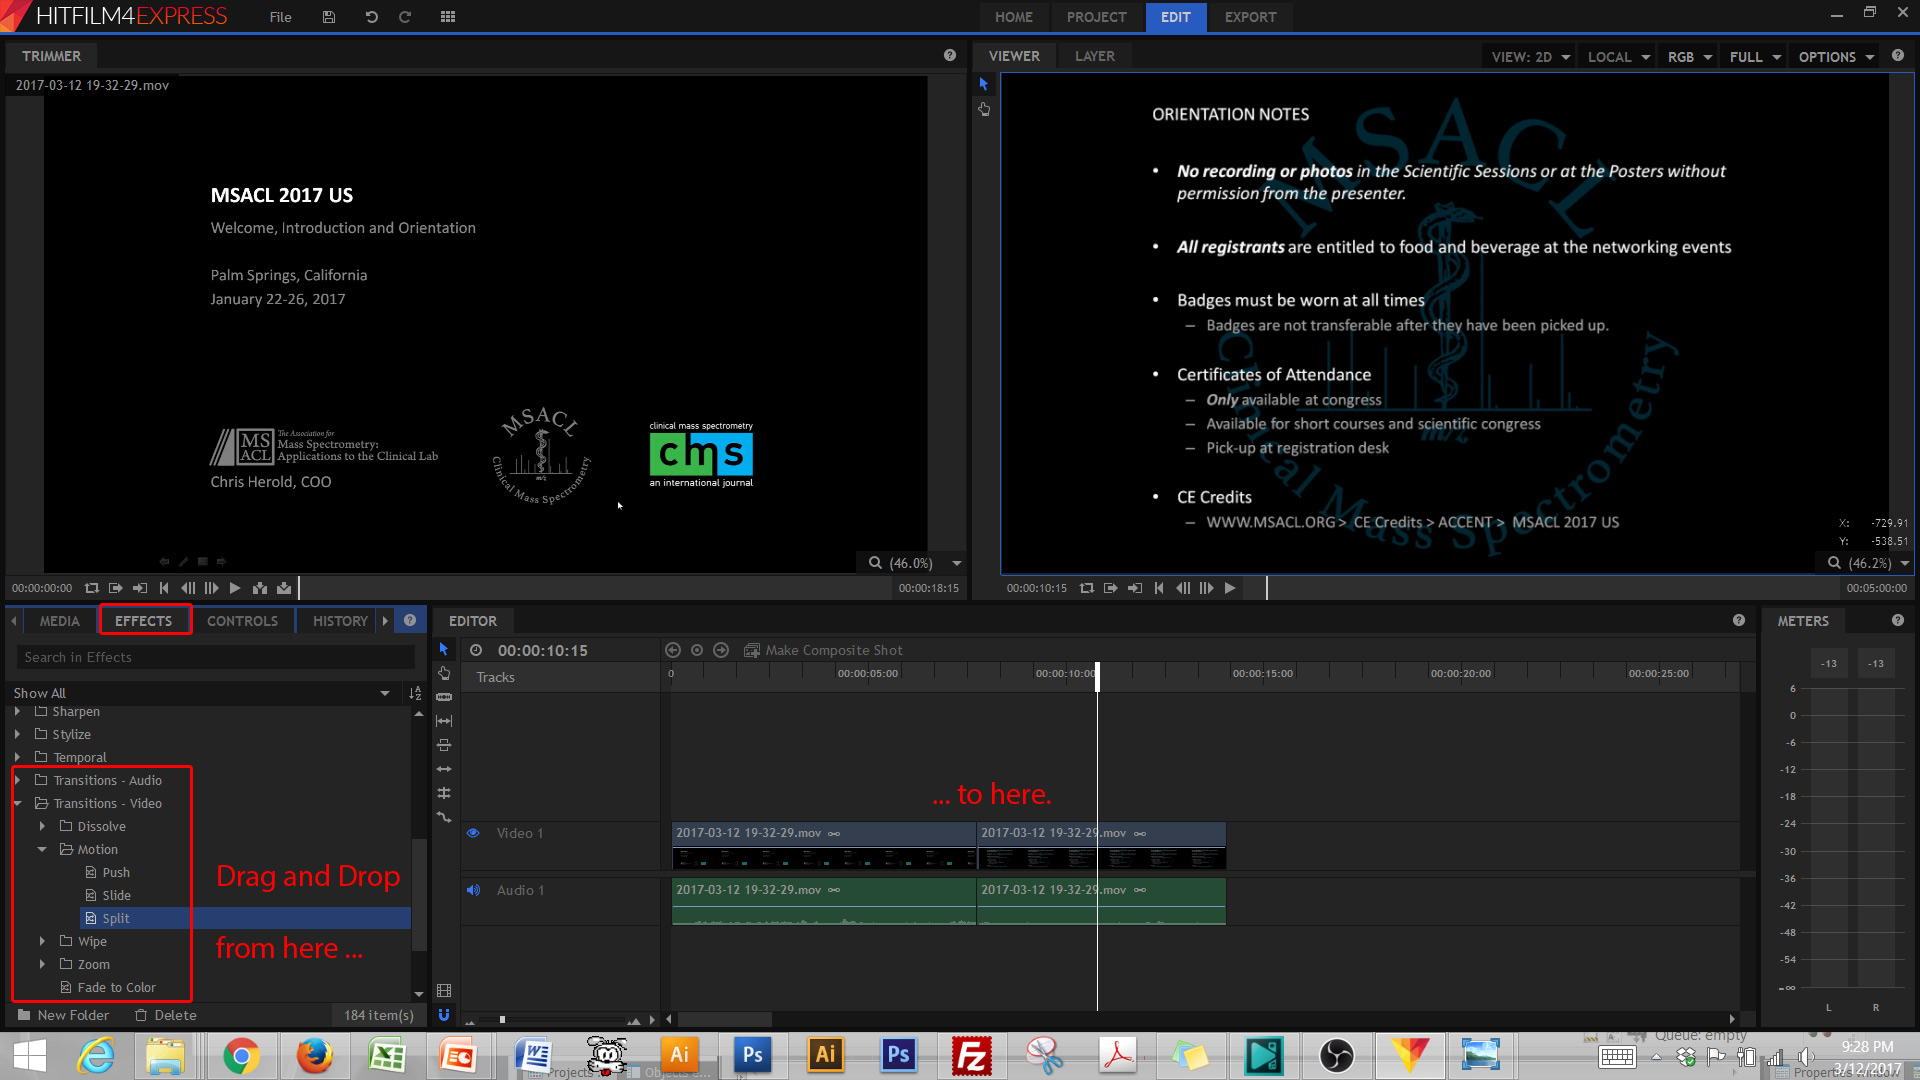
Once you have placed an effect or transition on the timeline, it places the effect under the CONTROLS tab that is specific to effects that have been implemented on the timeline. Here, you can view the effect properties by clicking on the triangle to the left of the of effect name. Some transition effects do not have properties.
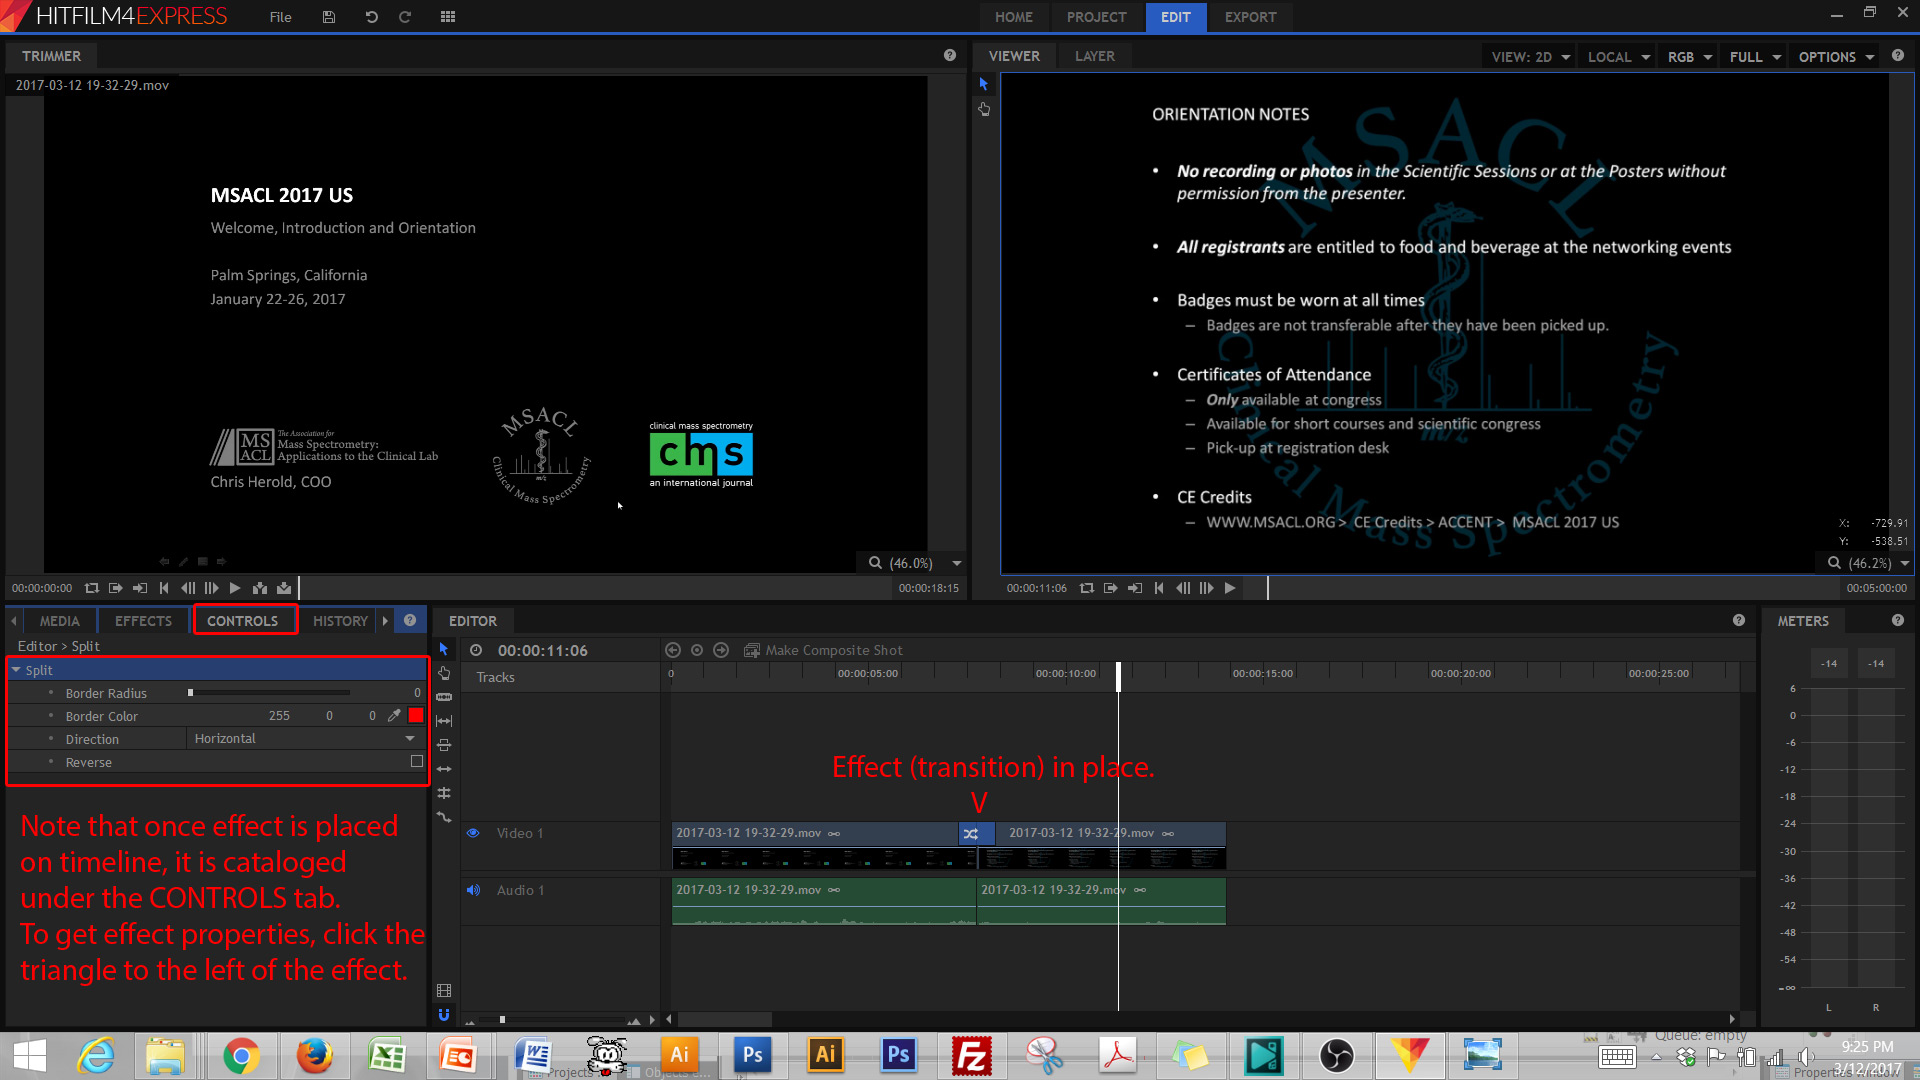
*TIP: After dropping an effect or transition onto the timeline it takes a while for the effect to render (process). So don't expect to be able to view the effect immediately following placement.
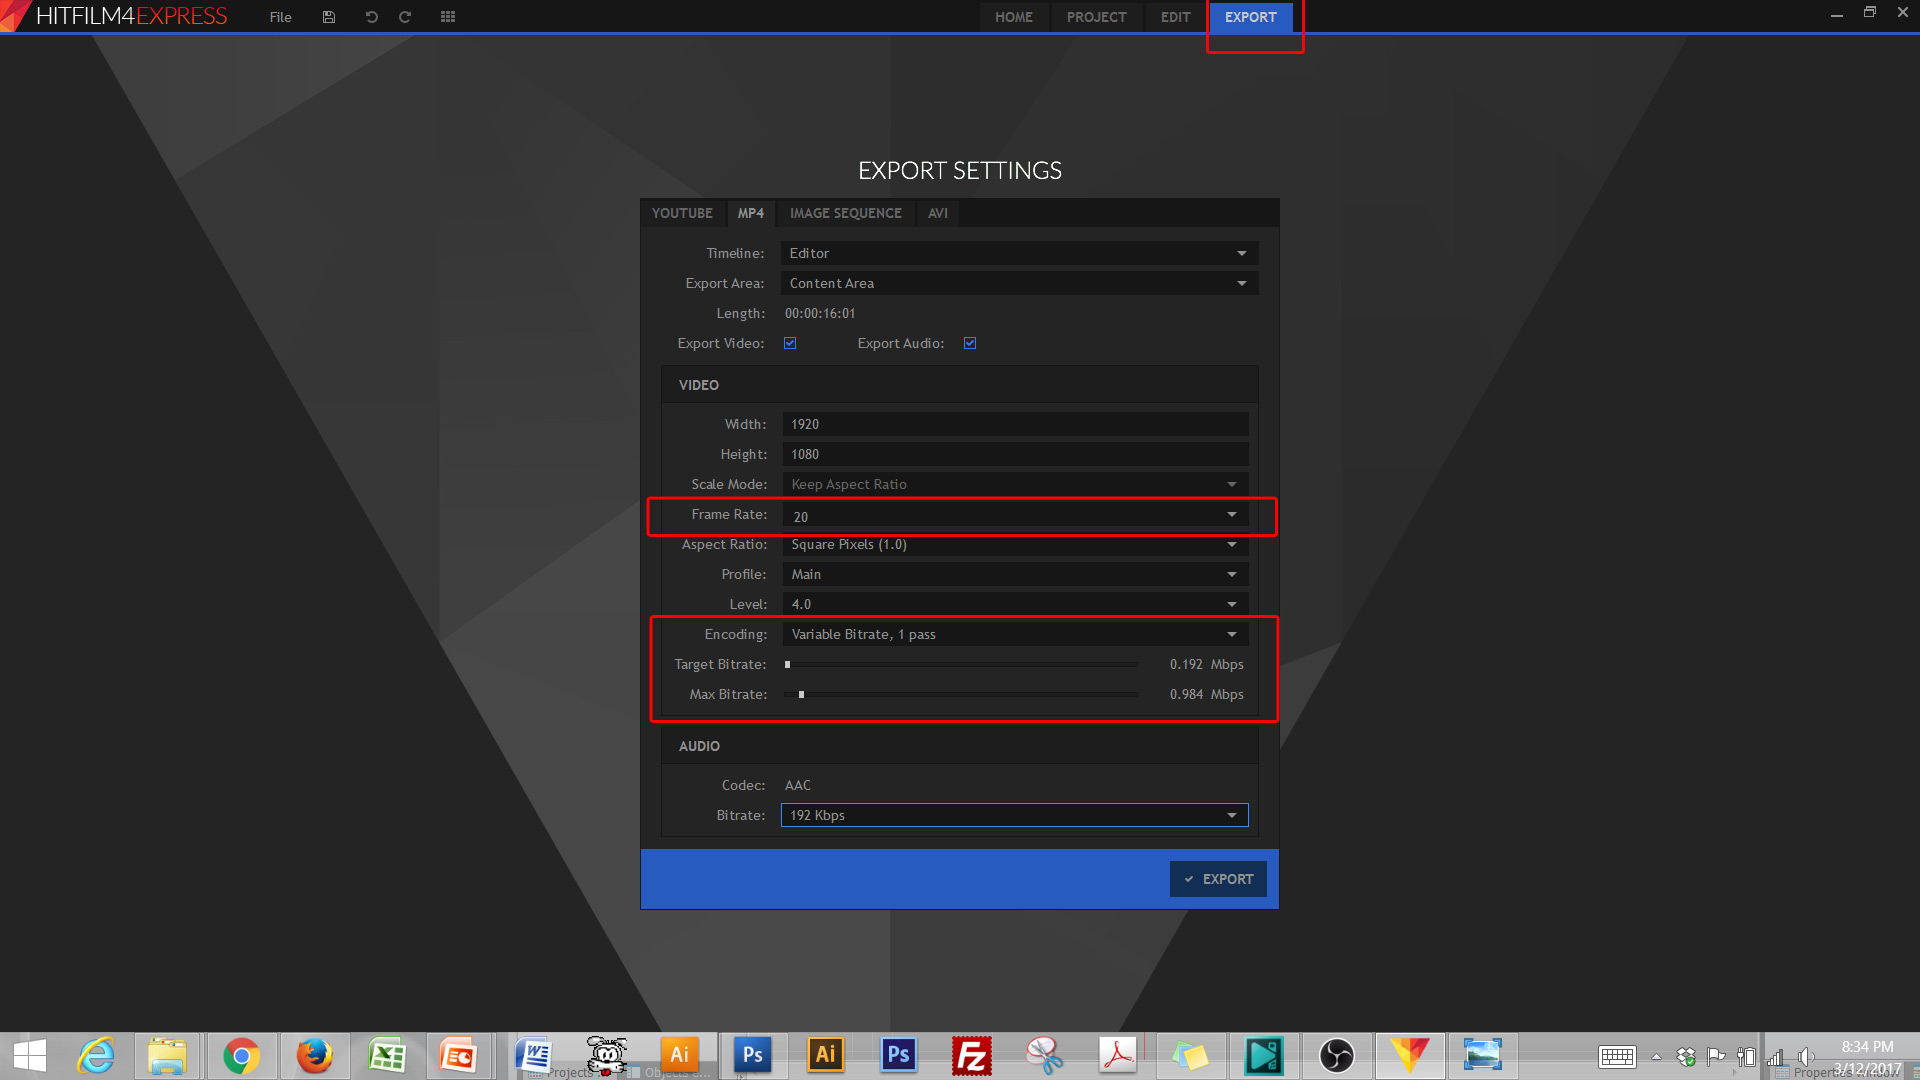
Step 9: Export the Edited Video File
Click the Export Tab at the top of the program window and confirm the settings.
Frame Rate: 20
Target Bitrate: 0.192 Mbps
Max Birate: 0.984 Mbps


Join the conversation